The Acer XG270HU is indeed an old monitor nowadays. It was released back in 2015. However, many people are still using this monitor because of its reasonable price and good features. Interestingly, to this day, people recommend this monitor when someone is mentioning a good 27-inch high-resolution gaming monitor. Now, if you own an Acer XG270HU, then you might be wanting to calibrate the picture/image settings.
Normally, most of the monitors come pre-calibrated out of the box. However, those settings might not be the best settings for your particular monitor. As a result, you need to customize the settings by yourself.
Chances are you are not aware of a good calibrated picture setting for the Acer XG270HU. No problem. Because we are here to help you, in this post, you will find the optimal yet best settings for the Acer XG270HU.
So, let’s begin…
Acer XG270HU at a Glance
Before we talk about the optimal picture settings of Acer XG270HU, let’s learn about the specifications and some unique features it offers.

About the Screen
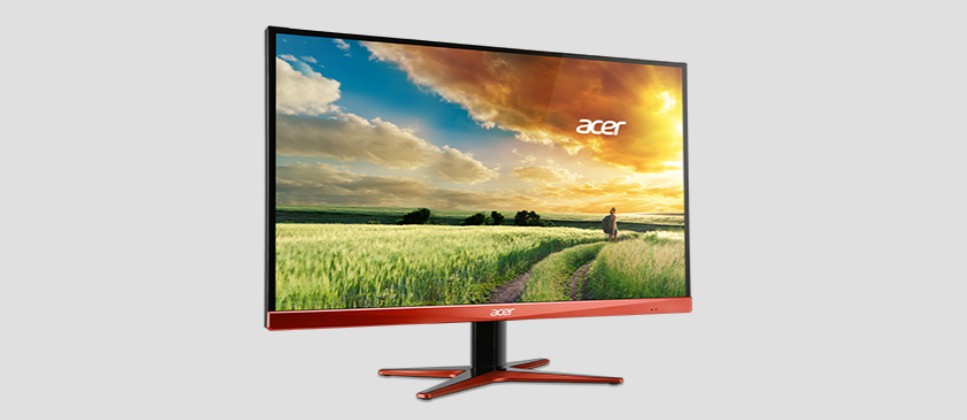
The Acer XG270HU comes with a 27-inch screen. It has a resolution of 2560 x 1440p or WQHD. The monitor is equipped with a TN panel. So, you might not get the best viewing angle with this.
However, if you want the fastest response time, then this has a lot to offer. Also, the monitor comes with an aspect ratio of 16:9. At the same time, it has a peak brightness of 350 nits.
Tech Specs
If you are a gamer, you will like that it comes with a 1 ms response time. Also, it features AMD FreeSync. It has a contrast ratio of 100,000,000:1. Another great feature of this monitor is that it has a 144 Hz refresh rate.
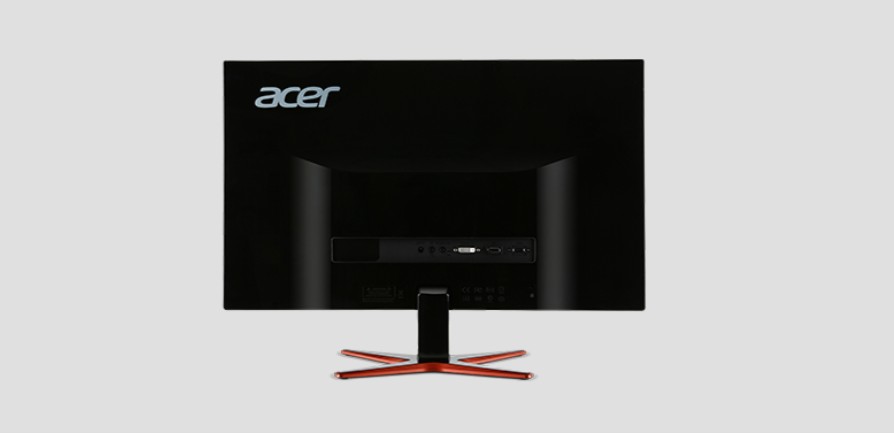
It comes with a tilt-able stand (-5°~15°). But unfortunately, it does not support VESA mount. Added to this, it also has 2 speakers of 2 watts each. That means they are of very low-quality. It would be best if you used an additional speaker or headphones with this monitor.
This monitor has 1 HDMI 2.0, 1 DVI, and 1 DisplayPort input at the back for connectivity. So, you can definitely use this monitor for multiple purposes.
Best Settings for Acer XG270HU Monitor
The Acer XG270HU monitor comes with a bad pre-calibrated picture setting. So, many users don’t like the monitor’s quality out of the box. However, we can tell you after a few tweaks here and there. It can offer great picture quality for the price.
Now, we have compiled a few different picture settings for the Acer XG270HU. And, we will be sharing them below. But before we do that, we have to warn about one of the settings on the Acer XG270HU monitor. And that is the ‘Super Sharpness’ settings.
Normally, it offers additional sharpness to the existing image. However, many users have complained that they have seen some white box visual distortion around the screen’s borders upon enabling the option. Worse yet, some users also complained that it heats the CPU a lot.
So, we would recommend not enabling this option if possible. Anyway, we will be revealing multiple settings for the Acer XG270HU below. As you know, there are no single best settings when you are trying to calibrate the picture quality on your monitor. So, let’s go….
Settings #1 Acer XG270HU Optimal Settings
- Under NVidia Control Panel – Saturation: 105
- Color Temp: Normal
- Brightness: 50
- Contrast: 50
- Black Level: 2
- Super Sharpness: On (For Powerful CPU)
- Gamma:4
In this case, we have not changed a lot of things. So, if you would like simple and straightforward settings for the Acer XG270HU Monitor, then you can check this out.
One thing to note, you might have noticed that we have left the ‘Super Sharpness’ to ON in these settings. However, we have told you not to enable it above. So it seems a contradiction.
The thing is that we have found out that if you have a high-power CPU, then you can turn it on. Otherwise, if you find out that your CPU temperature increases when the ‘Super Sharpness’ option is enabled, you should turn it off, keeping the other settings the same.
Settings #2 Acer XG270HU Optimal Settings
In the previous settings, it is clear that we have not changed a lot of things. However, if you would like to tweak a few more picture settings on your Acer XG270HU, you can try the next settings. Here we go…
- Brightness: 56
- Contrast: 50
- Color Temp User Red: 100, Green 97, Blue 98
- Gamma: 2
- Super Sharpness: Off
- Red Saturation: 53
- Red Hue: 50
- Green Saturation: 50
- Green Hue: 50
- Blue Saturation: 50
- Blue Hue: 50
- Yellow Saturation: 50
- Yellow Hue: 47
- Magenta Saturation: 50
- Magenta Hue: 50
- Cyan Saturation: 53
- Cyan Hue: 50
You can see that this is a bit complicated setting. Here we have tweaked a few more settings like the hue, saturation, and color temp.
Also, we have turned off the ‘Super Sharpness’ in this case; you can try to turn it off to see if there is any difference.
Settings #3 Acer XG270HU Optimal Settings
The 3rd number setting is a bit more advanced. In this case, we have tried to tweak many more settings than the previous couple of settings.

As a result, it would make a bigger impact than those settings. However, some of you might not like this setting. In that case, you can skip this after trying the first time.
- Brightness: 51/75 (Depends on your liking)
- Contrast: 73
- Black Boost: 8
- Blue Light: Off
- ACM: Off
- Gamma: 4
- Color Temp: User
- Red Gain: 37
- Green Gain: 38
- Blue Gain: 38
- Red Bias: 37
- Green Bias: 38
- Blue Bias: 38
- Super Sharpness: Off
- sRGB Mode: Off
- Red Saturation: 53
- Red Hue: 50
- Green Saturation: 34
- Green Hue: 50
- Blue Saturation: 34
- Blue Hue: 50
- Yellow Saturation: 34
- Yellow Hue: 50
- Magenta Saturation: 34
- Magenta Hue: 50
- Cyan Saturation: 34
- Cyan Hue: 50
You can see that these settings are more advanced. If you were not satisfied with the last two settings’ customization, you would probably like this. So, try this and let us know whether you like it or not.
Description of the Acer eColor Management
Above, we have shared some customized pictures and color calibration settings for the Acer XG270HU monitor. However, you might already know that Acer monitors come with some preset picture settings as well. Acer refers to them as the ‘Acer eColor Management’ modes.
With this feature, you can change your viewing experience on that monitor with a few clicks. The engineers of Acer preset these modes. So you might like them. In that case, you can usually use those modes based on the content you are watching on the monitor. There are 5 different ‘Acer eColor Management’ modes available such as User Mode, Eco Mode, Standard Mode, Graphics Mode, and Movie Mode.
Press on the ‘e’ key, and the ‘Acer eColor Management’ modes will appear on the screen. From there, you can select your preferred model. So, let’s learn more about these particular pre-defined display settings of Acer.
ECO Mode
Generally, the Acer XG270HU monitor doesn’t require much power to run. Still, if you want to reduce the power consumption further, you can use the ECO mode. This will automatically adjust the settings so that the overall power consumption of your monitor will be decreased.
User Mode
As the name suggests, if you have customized any picture settings on the Acer XG270HU monitor, it will be saved under the ‘User mode’. So, this is not a pre-defined setting. Rather, it is the settings if the user has tweaked any settings on the monitor.
Standard Mode
This is the default display setting on the Acer XG270HU monitor. So, you will find this mode activated on your Acer XG270HU out of the box if you have customized a lot of settings but not like the new settings.
Then you can go back to the default settings by selecting the ‘Standard Mode’. Many users use this mode all the time as it reflects the native display capability.
Graphic Mode
If you want to view any slideshows or browse social media sites on the monitor, you will like the Graphic Mode. Also, many users use this mode for gaming.
This mode enhances the overall colors of the display. So, photos and videos appear very vibrant with fine detail. If you want very sharp details, then you can use this mode.
Movie Mode
As the name suggests, Acer has included this mode for movie lovers. Usually, this mode enhances the clarity and brightness of the screen. So, it offers great visuals with fine details.
If you are watching videos or movies, you can use this mode. As a matter of fact, this mode is also better if the environment where you are using the monitor is unsuitably-lit.
Adjust it Yourself
If you are still with us, you know a lot more about customizing the picture settings on the Acer XG270HU monitor. It is possible that you didn’t like the settings we have provided above.
It could be that for your particular monitor, those settings were not the optimum settings. No worries. Because you can actually tweak the settings yourself. But how will you know that you are doing a great job customizing the settings on your monitor?
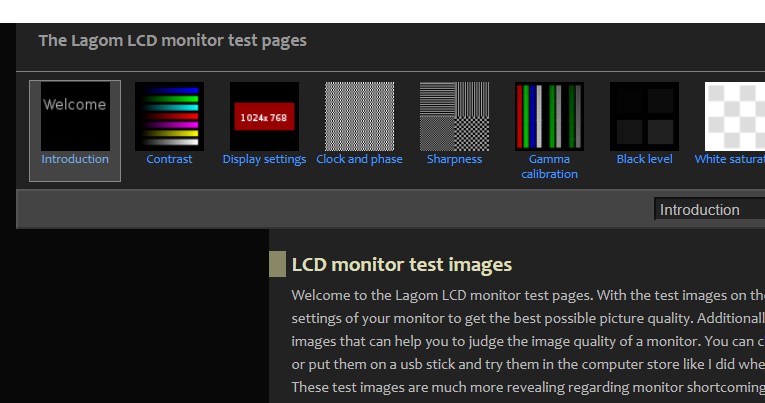
It is easy! Are you familiar with the Lagom website? It is a website where you can test the current picture settings of your monitor. At the same time, you can also use this website to calibrate your monitor to your liking.
There are a lot of test images on that website. And with each image, there will be some instructions from them to adjust the display settings to the best. So follow those instructions, and you will be able to adjust the picture quality of your Acer XG270HU monitor on your own.
Bottom Line
Every display panel is different from the other. As a matter of fact, if you buy the same model monitor twice, there will be a difference between the picture qualities of these monitors. It is always necessary to calibrate the settings to make your new monitor’s quality great.
To help the owners of Acer XG270HU with this, we have provided several settings above. We hope you will try all of them and decide which one is the best for you. At the same time, we have also provided you with other alternatives if you don’t like our provided settings.
We hope this post was helpful for you. And, you can share this with others if you have enjoyed this post. As always, you can leave your opinions or suggestions in the comments below!
More posts for you: